
Everything you need for animal shelter housing accessories is here in DIY fashion. Project difficulty ranges from easy-peasy to moderately hard. Project cost ranges from practically free to pretty cheap. Project satisfaction ranges from enormous to immense!
Some privacy, please?
I just need a little break
to be my best self
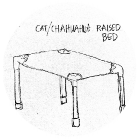
Up on my raised bed
Down below my hidey-hole
Raised bed, happy cat!
No not the wrapper
No not the milk cap. The toy!!!
Fine, have some paper
Carpet and zip ties
All you really need to give
Kitties room to strrrreeeeecccchhhhh
I love my portal
Adopters will fall in love
Now I can woo them
Peek-a-boo kitty!
For sleeping, hiding, or play–
Forts aren’t just for kids!
Kermit and Piggy,
Peanut butter and jelly,
Raised bed and cat mat
Rapunzel kitty
Climbing your tower, nurture
Curiosity
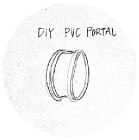
DIY PVC Portal

- Time: 1-2 hours
- Cost: $12
- Skill Level: Kinda hard, but you’ve got this!
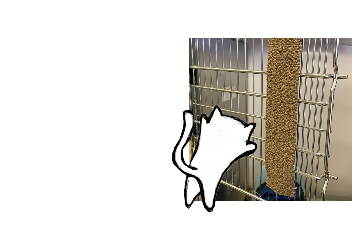
Portals convert cramped single-compartment housing to spiffy double-compartment condos that give cats more floor space, allow for separation of eating and elimination areas and make cleaning time easier for cats and staff alike.
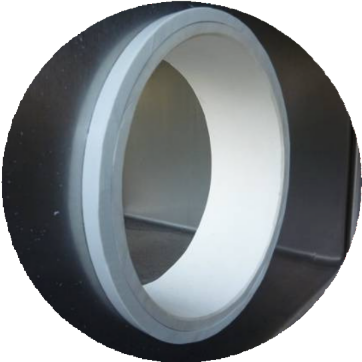
Homemade portals made out of PVC pipe work well, and are sometimes preferred when the distance between cages is unusual; however, the manufactured Kat Portals that we developed and are now made and distributed by SHOR-LINE come in three sizes: skinny, standard and wide. So nearly every cage type can now be portalized with the easy to install pre-made portals.
Still determined to make your own? (You know we love that!) Check out the info sheet in our library.
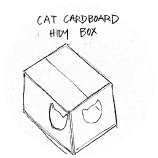
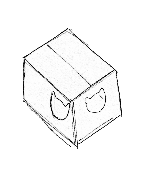
Hidey Box
Time: 10 minutes
Cost: $2
Skill Level: Easy
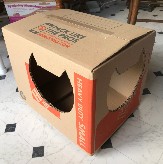
It’s hard to imagine a greater love than cats have for boxes. We may never figure out the mystery of that great love affair, but who are we to hold ’em back? For an extremely quick, easy, and inexpensive crafty project, check out the Cat Hidey Box!
Materials
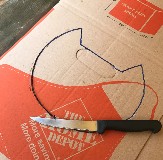
- Small heavy duty cardboard box 16 inches long x 12 inches wide x 13 inches tall (the one pictured here is from Home Depot)
- Sharp knife with 4″-6″ blade
- Sharpie Pen
- Tape
- Keep box flat. Lay the small, heavy duty cardboard box flat on the ground.
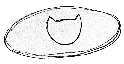
- Get your template ready. Take the cat silhouette template (used in the Cushy Cat Mat) and lay it on the side that will be the end of the box (it’s the 12 x 13 inch side).
- Trace the template. Place the template at about 4” above the bottom of the box. (When done this will allow for a cozy box the cat can step into.)
- Cut out the shape. Once it is traced onto the end take a sharp knife that is about 4-6 inches long to cut through both the end and the side of the box walls at the same time. Go slow and be careful.
- Tape the box. Tape the top and bottom. Add bedding inside and it’s ready to use.

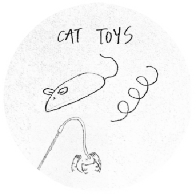
Cat Toys
Toys are great for enrichment. They can entertain a cat, not to mention the staff member, volunteer, or potential adopter watching her play. And here’s a surprising fact: cats are more likely to be adopted when they have toys in their cages… even if their adopter never sees the cat playing with them [see Fantuzzi, J. M., et al. (2010). “Factors relevant to adoption of cats in an animal shelter.” J Appl Anim Welf Sci 13(2): 174-179].
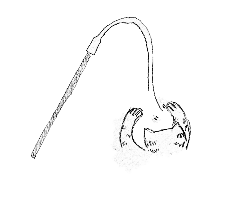
Magic Noodle Wand
SF SPCA, these are awesome! Thank you!
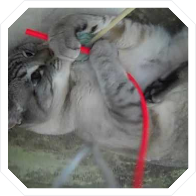
Attach a “noodle” to a dowel and watch cats go crazy! Give your feline friend a great workout by guiding them up and down their tower or through their portal hole before letting them have “the kill.” These noodles are easy to sanitize by soaking in a Rescue® solution (a big mesh bag helps keep noodles together while soaking) so you can use them over and over.
Materials
- Dowel
- Eyeglass retainer
- Otoscope
The wooden dowels are from:
Atlas Dowel
1-513-202-9444.
www.atlasdowel.com
Recommended sizes: 1/4 x 12″ and 1/4 X 24″ (shorter for cage play, longer when you are in a kennel/condo). Prices range from .10 to .20 each.
To purchase the “cat noodle”
(really eyeglass/sunglass retainers):
NECKZ Eyewear 1-866-779-7800
Joan: joan@neckz.com.
They are about $1 each, after tax and come in a variety of fun colors.
Now for the real secret: How do you attach the noodle to the dowel? You could just wiggle them on, but an otoscope tip that’s been cut at the very tip makes toy assembly a breeze. Great project for a volunteer working the help/welcome desk.
New adopters love to buy these, and we recommend adding a warning label that reminds guardians to “put away when not in play” so little nibblers don’t sneak a bite of that noodle.
Are they here yet?!
Enrich your cats’ days while they pass time waiting for their new adopters. Variety is the spice of life- we all get bored with the same ol’ same ol’. Think of ways you can use free materials to change up your play sessions and keep cats stimulated.
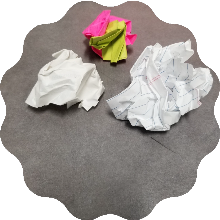
Paper Treat Balls
Materials
- Scrap Paper
- Cat Treats/Nip
- Imagination
Directions:
- Set chosen treat on a piece of paper.
- Crumple the piece of paper. It can be printer paper, construction paper, tissue paper, wrapping paper, origami paper…doesn’t matter. Crumple it into a ball.
- Throw it near the cat. See cat bat. See cat run.
Enjoy a desk free of paper clutter!
Photo – I took contents from my paper recycling bin and shared a tiny bit of my tuna sandwich for the middle, and that’s it! 2 seconds of effort = 45 minutes of play!
Pipe Cleaner Toys
Materials

- Pipe cleaners
Directions
1. Wrap a pipe cleaner around your finger. Bam. Coolest spiral everrrrr. (paraphrasing an actual quote from a cat)
Note: New toys are fun! Since this toy should only be used while supervised; it’ll be a special treat when it springs up during a play session, but make sure to take it with you when you leave.
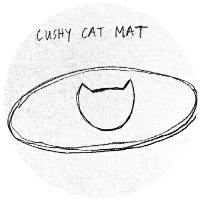
Cushy cat mat
- Time: 20 minutes
- Cost: $10
- Skill Level: Basic sewing knowledge
Designed specifically to accompany the raised bed (either atop or underneath) this gem is easy to make, easy to clean, and the ultimate in shelter comfort. Plus it’s just ridiculously cute. Nothing has paired better since wine and cheese.
Materials:
- 1 yard of Polar fleece
- 1/2 yard of 1″ polyester batting
- Pins
- Sewing machine
- Scissors
- 21″ x 14″ piece of newspaper
Directions
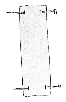
- Make a bed pattern out of newspaper. Take a piece of newspaper or other 21″ x 14″ rectangular shaped paper, fold it in half and then in half again, on the edge that has all four corners of the paper free, round the edges off with a scissors to get the round shape of the bed.
- Cut the fabric. Pin the pattern you just made to the Polar fleece and cut 2 pieces.
- Cut the batting. Using the pattern again, cut 1 piece from the 1″ polyester batting. Then trim off an extra ¼” from the batting edge all the way around to make it a little smaller than the pattern.
- Sew fabric together. Place two pieces of fleece on top of each other with right sides together (the sides you want to face outward should be touching) and sew around the edges with a 1/4″ seam. Leave a 10” section open.
- Turn the bed right side out.
- Insert the batting. Insert the batting through the open edge. Gently lay the batting inside the bed, making sure that it is smooth and free of wrinkles.
- Sew it shut. Fold under the edge at the opening, pin to hold in place, and sew over. Sew close enough to the edge to catch both edges. Continue to sew around the edge of the entire bed.
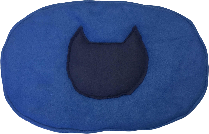
- Make a design. Simply stitch the center of the bed with a shape of a cat head (see template) or cut the cat head out of a separate piece of polar fleece and sew along its edge in the center of the bed. This will help to keep the batting in place as it’s used and washed.
Scratchers
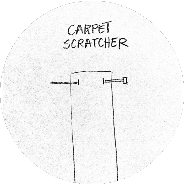
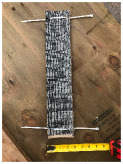
Carpet scratcher
- Time: 10 minutes
- Cost: $1
- Skill Level: Easy
Cats have a natural desire to scratch and stretch. Scratching helps cats remove the dead outer layer of their claws while stretching keeps cats physically fit and mentally healthy. Keep the cats in your care happy and stimulated by providing a carpet scratcher to hang on the cage door. These are fun and easy to make, and you’ll receive a hearty thank you, the first time a kitty streeeeeeetches out and scratches your handiwork.
Materials:
- Carpet remnants, or new stiffbacked throw rug
- Carpet knife (be careful now, these are sharp)
- Long piece of wood to cut upon
Make these 3.5″ to 5″ wide and about 18″ tall to fit 2×2 cage doors.
Directions:
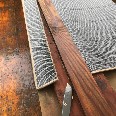
- Prepare for cutting. Place the carpet face down onto the board used for cutting upon. Use a second board (the one that is the width of your chosen scratcher) and lay it on top of the carpet. (pic 1)
- Line up the edges of the board and carpet. Cut along the scratcher board edge through the carpet down to the cutting board. Voila! you have a nice carpet strip of the desired width.
- Cut the carpet strips. Cut the carpet strips into 18″ lengths and your carpet scratchers are nearly made.
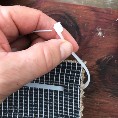
- Zip! Zip! On either end of the strip of carpet add a zip tie by using the carpet knife to make a couple small slits in the back of the carpet so you can slide a zip tie through. Orient the zip tie such that it can be easily closed when hung on the cage door.
- Attach. When attaching these to the cage door, take an extra zip tie to attach the scratcher to the upper bar of the door – so it won’t slide down when the cat scratches on it.
Cardboard Scratchers
- Time: 10 minutes
- Cost: $1
- Skill Level: Easy
Thanks Indiana Humane, these are such fun!
Cats have a natural desire to scratch and stretch. Scratching helps cats remove the dead outer layer of their claws while stretching keeps cats physically fit and mentally healthy. Keep the cats in your care happy and stimulated by providing a cardboard scratcher to hang on the cage door. These are fun and easy to make, and you’ll receive a hearty thank you, the first time a kitty streeeeeeetches out and scratches your handiwork.
Materials:
- Box cutters
- Scissors
- Cardboard
- Non-toxic glue
- Catnip
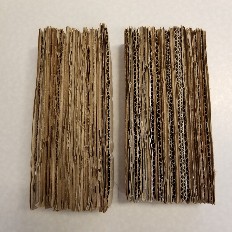
- Cut the cardboard. Cut about 25-30 pieces of cardboard for each scratcher you intend to make. The thinner the cardboard, the easier to cut; although you’ll need more pieces the thinner it is. Pieces should be approximately 1-2 inches wide and 8 inches long – it is most efficient to make the initial cuts with box cutters and then follow the lines to make final cuts with scissors.
- Glue the cardboard. After all the pieces have been cut, use non-toxic glue to glue pieces together. Glue pieces so they are stacked on top of each other.
- Dry. Let dry overnight.
- Choose delivery method. Hanging or freestanding? See below.
- Spice it up. Sprinkle catnip on the completed cat scratcher.
- Live it up. Give to cat to enjoy!
Freestanding: You may use a shoe box cover or any piece of cardboard to act as your base. Simply follow all the above steps, but on Step 2 you will also need to glue the side of your scratcher to your base.
Hanging: Without a base, you may use a zip-tie to hang the scratcher to a cage door. Glue a small square of cardboard (½ inch by ½ inch) to the top and bottom of the scratcher diagonally (so the top piece is off-center to the left and the bottom piece is off-center to the right). Once the glue is dry, use a hole puncher so you can tie the scratcher to a cage door.
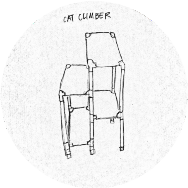
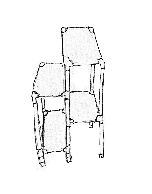
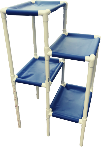
Climbing Tower
- Cost: $75.00
- Time: 2 Hours
- Skill Level: Medium to hard
Looking for a building challenge or an opportunity to show off your crafty skills? Give the climbing tower a try! These are fun to build and provide four levels of glorious wild kitty antics, sleepy spots, plus they just look so dang cool! Up for the challenge? Don’t forget to send photos of your tower to us at sheltermedicine@ucdavis.edu.
Materials:
- Saw to cut the PVC
- Clear PVC glue
- PVC pipe and fittings: See breakdown below
- 2 yards of 18 oz vinyl coated fabric
- Heavy duty scissors
- Marker
- Paper towel
- Mallet
- H66 glue for vinyl material
- Fittings: All fittings are for 1” PVC pipe (furniture grade is fine).
- 6, 3-way
- 10, 4 way
- 6, end caps
- PVC Pipe: 4, 1” PVC pipe 10’ long.
- PVC pipe can be found at home improvement stores in the plumbing section (these are generally 10 feet long).
Pro Tip: Read through instructions completely before making this – it helps to reduce mistakes on this one.
Directions:
Cut 1″ PVC pipe.
Note: Mark each piece with its length near one end or the other of the pipe (the marking will get covered by the fittings if it is within about 1″ of either end).
4 pieces 11.25”
6 pieces 10.5”
4 pieces 22.5″
2 pieces 23.25”
8 pieces 17.5”
8 pieces 11.5”
Cut out vinyl for the beds. Use the bed pattern included in the Raised Cat Bed instructions.
Cut out 4 beds from vinyl coated fabric.
Assemble the bed frames. Use the 11.5″ and 17.5″ pieces and the fittings for all four beds. (11.5″ for the ends and 17.5″ for the sides).
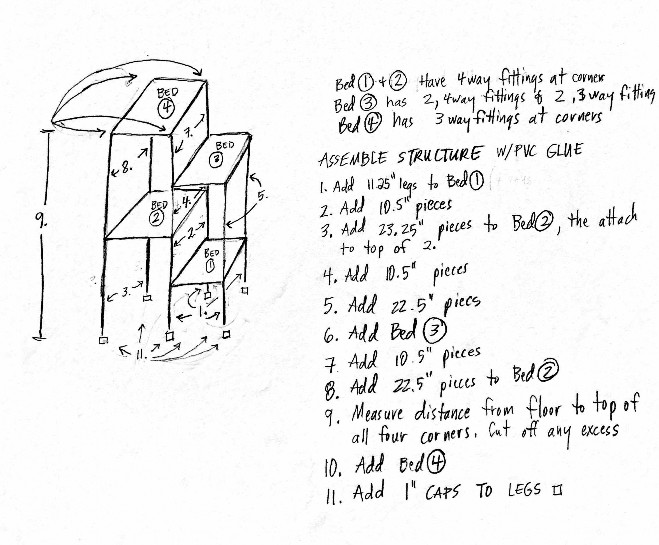
The fittings differ for several of the beds (see diagram above):
- Top bed will have 3-way fittings at all four corners
- Third bed will have two 3-way fittings and two 4-way fittings
- The two lower bed will have 4-way fittings at all four corners
Assemble the rest of the structure. Putting it together loosely will help to identify how beds/fittings/pipe will go together for assembly. Use the Assembly Guide drawing to help assemble.
Disassemble the structure. Keep like lengths together for reassembly. Keep beds intact.

Tempted to skip this step, aren’t you? Don’t! Promise I wouldn’t have you do this if it wasn’t a huge time saver in the end. “Measure twice, cut once,” is dang good advice that I have learned the hard way myself.
Add vinyl to the bed frames. See Raised Bed instructions to make all four beds.
Final Assembly: It’s easiest to build and glue the tower from the bottom up. Use the Assembly Guide drawing above to reconstruct the tower.
Ensure the PVC pipe seats fully into the fittings. A mallet may be helpful to have handy for any stubborn connections. PVC glue dries very fast so make adjustments quickly.